All modern video editing systems have a keying feature to replace the background from a shoot against a green screen. To get optimal results does take special attention both during shooting and in the edit suite.
Why Green? Technically any saturated color could be used for keying but green is usually used because it is the least likely color to be found on human skin and in clothing. We have all seen the gaffs of television sports casters whose green tie revealed a crowd of faces in his shirt!
Shooting tips:
- Lighting for green screen is very important for the best results. The background should be evenly lit and separated from the subjects, as green light can spill on to talent and create problems. Our 12 foot wide green screen is pre-lit with with dedicated cyc lights, hanging from a ceiling grid in optimal position. This eliminates floor stands, creating more space for shooting.
- We have a basic configuration for a subject with 3-point lighting (key, fill, back lights). We’ve had some very complex setups shot here, and we can supply expert help, or you can do everything yourself.
- If you have specific background in mind, pay attention to the direction and type of lighting to match the background.
- Don’t worry about the edges of your camera frame going off the background, any area of the frame that the subject is not going to be in front of can easily be trimmed in post with a matte or cropping tool.
Post-Production
- Some of the editing systems commonly used are: Avid, Final Cut Pro, Adobe Premiere, Vegas and After Effects (for the most detailed compositing work). Often applying the effect and clicking on your background will automatically reveal your background layer.
- There are a number of settings to perfect the edges and optimize the image, feathering edges, removing green edges, spill suppression, etc. Some subjects like wispy blonde hair or smoke can take more effort for a clean key.
Resources for more information
- How to light a green screen – This covers the basic set up, lighting the screen itself, and how to position and light your subject.
- Video Lighting Basics – Three Point Lighting – The most common setup for a single person subject. This has great advice for achieving a professional look.
- Green Screen Production with Adorama – Rich Harrington covers the essentials from lighting and testing to keying.
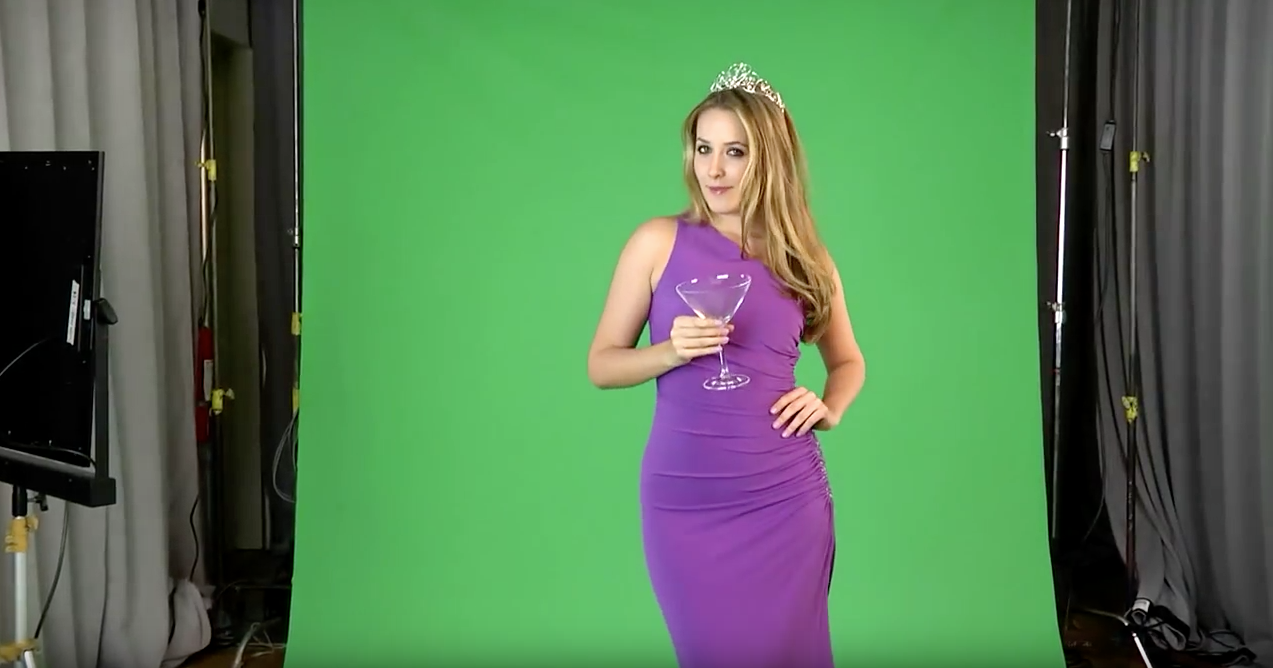
Cristina on the green screen set at our studio

A still from the final product
Still Keying
- While Chroma Keying for video is usually done within the editing app, Keying for stills is often accomplished using software such as Photoshop, Primatte Chromakey or Cinematte.
- A good key with photographs starts with good lighting and positioning of the subject in relation to the green backdrop.
Chromakey Lighting
- It is best to be sure the background is evenly lit, about one stop darker than the subject, and at least 4 feet away and better yet 8 or 10 feet away. This is for two reasons: to reduce shadows from the subject light on the green background and to reduce possible spill of green color back onto the subject
- Generally for portrait shots of people, basic two or three point lighting works well. If a back light is used, care should be taken not to make it too strong as this can look artificial and also create problems with fine details like wispy hair and smoke.
Example of Still Chromakey
- In this example, Bill and Carol are standing in front of a green seamless paper background, which is even lit from above. The key-to-fill ration is about 2 to 1. Photoshop was used to create the key, as explained in this excellent article.
- Here is another link to an informative overview called “Chromakey Photography Secrets”.